Affordable Hardware Upgrade for Houdini

NVMe M.2
Houdini is well known as a RAM eater and Houdini can easily utilize all the cores for almost 90% of its simulations. Particles, pyro, FLIP fluids, height fields, RBD Destruction, grains, hair / fur, and more! Upgrading the specs on your computer is a direct solution, but can get expensive very quickly. In this post, I describe a simple PC upgrade that worked out in speeding up my Houdini operations.
Quick and Affordable Fix

NVMe M.2
NVMe M.2 is a storage device that uses NAND type storage similar to USB flash drives, except NVMe M.2’s are much FASTER and very affordable! NVMe M.2 can reach upto write and read speeds of 3500MB/s. To put things into perspective, a traditional hard disk with 7200rpm has upto 100MB/s and SATA III drives can do 600MB/s.
Speed Specs
NVMe M.2    3500MB/s
SATA III     600MB/s
Hard Disk    100MB/s
(7200rpm)

*Speeds may vary with brands.
On spec, the NVMe is almost 6 times faster than SATA III drives and almost 35 times faster than traditional disk drives! Now this is in the perfect case scenarios and we all know that never happens in real life. Some configuration or a particular component in the PC may bottleneck the data bandwidth to the storage devices and speeds may vary depending on each setup. STILL, the NVMe M.2 devices are still so fast that even with a little loss here and there, it’s still multiple times faster than any other common storage devices on the consumer market.
You can see the difference! Speeds may vary among brands, but I think it’s safe to say NVMe is way beyond the other devices. The best thing is upgrading a PC’s storage to NVMe technology is fairly easy and very cheap when compared to upgrade options!
When upgrading to NVMe M.2 storage you gain massive performance boost on your machine, I would say this is best bang for your buck in terms of dollar value and performance gain. Scroll below to read how this device will help with Houdini tasks.
Best Value Out of Other Upgrade Options
NVMe M.2
A 500GB NVMe M.2 of a reputable brand will put you in the range of about $60USD more or less, I would say under $100USD for sure. Unless it’s a really fancy brand edition or something.
GPU & power supply
Upgrading the GPU to a decent video card, needless to say will cost you something in the hundreds and thousands and may result in the need for upgrading the power supply as well. Most high end video cards use above 200Watts of power just for the GPU itself and you may not have enough wattage in your existing setup to run the fancy GPU along with the rest of your current machine configuration. So there is a possibility when you upgrade your GPU, you may also need to upgrade the PSU together at the same time.
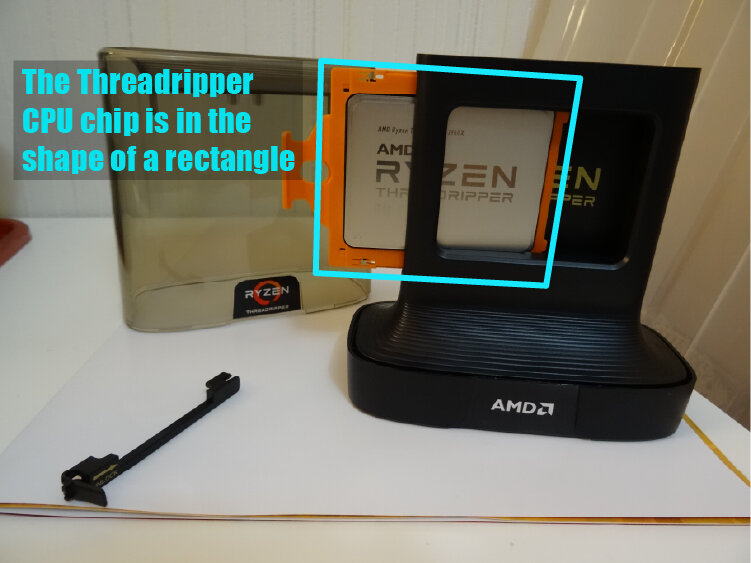
AMD Gen 3 Threadripper 3960
CPU
If you consider upgrading the CPU, it’ll cost you the price of the CPU chip and may involve upgrading the motherboard too, because you need to find a matching socket for the CPU on the motherboard. You can reuse the RAM sticks, hard drives, PC fans, and you may probably get to reuse the chassis (PC case).
The only time that may require you to upgrade the chassis is when you buy a completely different motherboard form factor. For example, if you went from an ATX to a mini-ITX or the other way around. Needless to say, upgrading the CPU involves a little more than just upgrading the CPU itself and may require you to plan a little ahead.
This isn’t always the case! For example, I bought a Gen3 Threadripper 3960 and a TRX40 motherboard and in the future if I wanted to upgrade the CPU, I can buy a Gen3 Threadripper 3990, which has the exact same TRX40 socket. This means I can just simply swap the two CPU’s without changing anything else on my setup.
Either way, it’ll cost a lot less to buy a NVMe M.2 and upgrade the storage of your PC and it’ll make things a lot simplier.
Brands
The model that I bought is Western Digital’s Black SN750 Gen3 NVMe M.2 with 500GB, which is installed on my Mini-ITX build. I added an Amazon link on the right, which is also an affiliate link. The performance is is amazing! It gives my small machine a boost which was important in this case, because my Mini-ITX’s doesn’t have as much CPU power as my main machine.
The speeds of the NVMe made up for the less performing parts of the machine. And in some scenarios for some selective tasks, it would run faster than my main machine, but this is only for very few tasks. For example when the main task is writing to disk, of course it would be faster with the SN750 with higher write speeds.
This product has write speeds of 2600MB/s and read speeds of 3430MB/s. I was very satisfied with this product installed on my Mini-ITX.
Click here for the WD product page. (scroll down on the page & click on “Full Specifications” to review the specs)
Using an Older Model NVMe M.2 on my Main Machine
On my main workstation is a full ATX machine, I have installed Western Digital’s Blue SN550 Gen3 NVMe M.2 with 500GB of storage capacity. This is an older model compared to the model named “WD ‘s Black” described above. WD’s Blue has write speeds of 1750MB/s and read speeds of 2400MB/s. It’s a bit slower than the WD’s Black model and I certainly feel that difference when using my it.
Click here for the WD product page. (scroll down on the page & click on “Full Specifications” to review the specs)
Recommendation
My recommendation is get the newer model, SN750! Because as of late (this post has been updated since) there is almost no price difference between the SN750 (newer) vs SN550 (older), so if the newer one costs the same, of course get SN750 (newer model), which is a bit faster. And when you put things in perspective the speed gain you get out of your machine is well worth the extra few bucks!
The only reason I installed SN550 an older model M.2 onto my main machine was because there was actually a significant price difference and I was low on cash at the time, but now that the SN750 cost about the same as the SN550, if I had a chance to get another one, I would choose the newer one.
I have removed the Amazon Affiliate link to the WD Blue SN550 (older model) posted on the right of this post, because I want people to get the newer model instead, since it costs about the same as of the time when I updated this post.
Benefits of NVMe M.2 in Houdini

NVMe M.2
Speed is definitely an advantage! How does this help us in terms of Houdini operations? Houdini actually does a lot of reading off storage for many of its operations.
Personal Experience
When I installed Houdini on my NVMe storage, I found out that Houdini booted up significantly faster than when it was installed on my spinning hard disk. This was just a personal experience, and not based on any professional benchmarking.
NVMe M.2 Improved Rendering Times
I also noticed that after installing NVMe M.2, it significantly improved the rendering speeds! This I can understand because after every frame is rendered, it needs to be written to disk and since the NVMe is so MUCH faster for write speeds, it speeds up the rendering process in general.

Houdini File Caching dopnet SIM data
Reduce Cooking Times in Simulations
If we throw down a File Cache node and write each frame’s simulation process from the dopnet, this will make it easier for playback if you lack memory on the PC. Since NVMe M.2 write speeds are super fast, this won’t increase the cooking speeds.

Houdini running out of memory to cache dopnet SIM so blue bar starts to disappear
When cooking Houdini simulations with very little RAM, we might run out of RAM in the middle of the cooking process, which makes it hard for playback. If we run out of RAM during the middle of cooking a simulation the blue bar on the bottom of Houdini will start to disappear.
Downside to using file cache node

Houdini dopnet Simulation Cache
The only downside to this approach is that every time you want to do a test cook of the SIM, you’ll need to cache a few frames using the File Cache node. This type of workflow is similar to using the Flipbook in Houdini, except in this case you’re writing the cooked simulation data to disk. If you run out of RAM while Houdini’s still cooking, you’ll still be able to playback the simulation, but you’ll lose the SIM data where the blue bar has disappeared in Houdini.
Upgrading Memory
DDR4 RAM sticks are expensive and if you buy smaller size DDR4 RAM sticks like 8GB it literally wasting a precious memory slot on the motherboard.
Size Does Matter!
When upgrading RAM, it’s better to buy the largest possible RAM stick like 32GB. This is a long term solution for your PC. Imagine a few years down the road, when you want to upgrade the memory again, but your motherboard is out of spare memory slots! You will be left with expensive options available, replace the already bought RAM sticks or replace the motherboard and get more slots?
Think about the Long Term Solution
If you buy more 2 more 32GB RAM sticks to replace two occupied slots that already have 8GB sticks. You would be wasting your money rebuying memory that you already owned, but just don’t have enough slots to fill. If you bought the two 32GB RAM sticks to begin with it would have saved you more money in the long term.
On the right is the DDR4 RAM sticks that I use for my Mini-ITX build. They were the cheapest that I could find of DDR4 RAM sticks that are 32GB each totaling a 64GB configuration.
UPDATE: The price for this product (Patriot Viper DDR4 64GB configuration) has increased significantly since I last write this blog post and I feel it’s necessary to update this post.
I have to be honest, it was like 25% less than the competitor’s memory sticks so I was very skeptical at the time. But I bought it anyways because I needed memory for my machine and I was on a very tight budget. I am very pleased with the performance and after using it for almost 6 months and running, I haven’t had any issues so far. It doesn’t have the fancy LED’s flashing, but in the end of the day I just wanted affordable 32GB RAM sticks.
Upgrading CPU
More cores! More cores! Houdini simulations cook a lot faster with more CPU cores computing at the same time. Mantra uses CPU computing power to do its rendering tasks. Having more CPU cores will definitely speed up rendering times. You’ll get more of those squares flashing around on the Render panel.

AMD Threadripper 3960 Gen3 (24 cores)
AMD’s Threadripper series of CPU products are an incredible lineup! Impressive number of CPU’s for a remarkable price! However it is still not cheap. I have another blog post where I go into more details about the AMD Threadripper and I describe how to install the Threadripper chip onto the motherboard:
Quick Overview of AMD Threadripper 3990
Announcment when AMD Threadripper 3900 Series Release
I personally own a AMD Threadripper 3960, which has 24 cores and is hyperthreaded to 48 cores. This comes incredibly handy when rendering with Mantra, but I did use the hard disk and NVMe M.2 for storage as a comparison test to see how it performs under Houdini operations.
On the right is the link of the AMD Threadripper product that I bought and am currently using for my main workstation.
NVMe M.2
After switching my system to a NVMe M.2, I could still feel a significant boost in performance in rendering with Mantra, I suspect it’s writing to disk a lot faster and writing each rendered frame to disk a lot faster. This was a lot faster in comparison to the old traditional spinning hard disk. As for the cooking process, I couldn’t actually feel the difference, because when cooking simple SIM’s, it just cooked so fast I can’t really tell. And when cooking complex SIM’s, it just took too long and I wasn’t doing a really professional benchmarking test. This is all based on my experience with the two different storage devices, NVMe M.2 and traditional hard drives.
But I could tell it was significantly faster after the complex SIM was fully cooked and I would hit the “Save to Disk” button on the File Cache node. That just zipped right across.